Americans throw away 81 pounds of clothing annually. Most discarded items have simple tears or missing buttons. These issues could be fixed with simple sewing skills.
A favorite shirt develops a small tear. A button pops off at the worst moment. These common wardrobe mishaps don't have to mean the end of your beloved clothes - simple sewing stitches can save your wardrobe and money.
Learning fundamental sewing techniques is easier than you might think. You can mend clothes, start a crafting hobby, or become more self-sufficient. The process begins with threading your first needle and creates perfect straight stitches.
This beginner-friendly piece covers simple sewing stitches, necessary tools, and proven techniques. These fundamentals will help you sew with confidence. Let's begin!
Essential Sewing Tools and Setup
Let's start a journey into sewing by getting the right tools and creating the perfect workspace. I tell my students that the proper setup is half the battle won.
Choosing Your First Sewing Kit
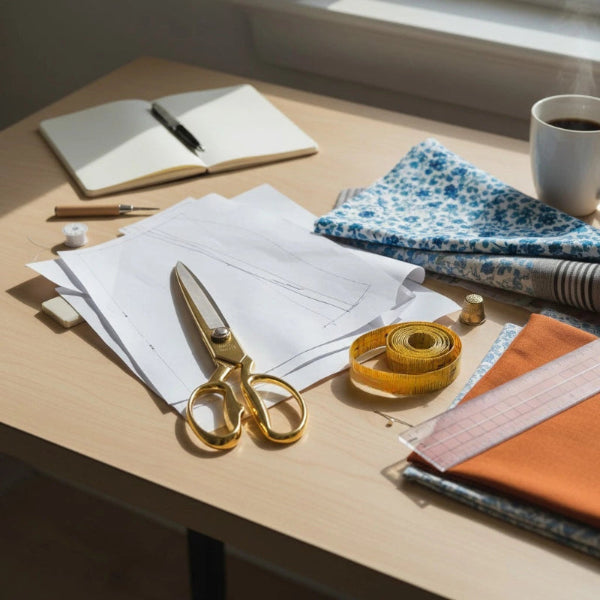
You don't need to break the bank to start with simple sewing stitches. A good set of sewing tools helps you handle all the little tasks in sewing, from measuring to cutting precisely. Here's everything a beginner needs:
- Fabric Shears: Choose trusted brands like Gingher or Fiskers for ergonomic options
- Glass Head Pins and Pincushion: These allow you to iron over them without melting
- Seam Ripper: A quality brand like Clover is recommended
- Measuring Tools: Both a clear ruler and flexible measuring tape
- Marking Tools: Tailor's chalk or fabric marking pens
- Thread: Start with neutral colors like black, white, brown, and gray
Setting Up an Ergonomic Workspace
We spend countless hours at our sewing stations, so proper ergonomics is a vital part of the setup. Your elbows, hips, and knees should form right angles to prevent shoulder, back, and wrist strain.
The bed of your machine should line up with the bottom of your rib cage. This creates a natural right angle for your arms and helps you avoid hunched shoulders that cause neck fatigue.
Good lighting helps you maintain proper posture. Natural light reduces slouching by a lot. Place your work area near windows when possible, and add task lighting for detailed work.
Understanding Different Needle Types
The right needle is significant for successful sewing. The bigger the size number, the bigger the needle. Thinner fabrics need smaller needle sizes.
Universal needles work well with most non-specialty fabrics, making them perfect to start with. They come in combo packs with various sizes that suit simple sewing projects.
Stretchy or knit fabrics need Stretch/ball point needles. These have a specially designed medium ball point that prevents skipped stitches. Denim needles handle thick materials without breaking, perfect for denim or heavy fabrics.
Note that you should change your needle at the start of each new project. This simple habit prevents skipped stitches and ensures even stitching throughout your work.
Hand Sewing Fundamentals
Becoming skilled at hand sewing starts with simple fundamentals that will help you succeed. My experience teaching countless beginners shows that the right technique makes the difference between frustration and achievement.
Proper Hand Position and Posture
Professional tailors have used the "Taylor's pose" for centuries, and with good reason too. Your hands naturally fall into the right position for optimal sewing when you sit cross-legged. This position keeps your spine straight and stops neck strain that comes from hunching over your work.
Working at a table needs your arms to rest at a natural angle without leaning on your elbows. Hand-foot-eye coordination develops naturally with proper positioning, which makes sewing easier.
Threading Techniques for Beginners
The right thread length matches the distance from your shoulder to your fingertips. This measurement gives you enough thread to work with and prevents tangling. Here's my proven threading process:
- Trim the thread end at a 45-degree angle to thread easily
- Stiffen the thread using water or wax
- Place a white background behind the needle to make the eye more visible
- Use a needle threader tool if you're having trouble
Basic Knot Tying Methods
A properly tied knot forms the foundation of good hand sewing. The quickest way I've found is the wrap-around-finger technique:
- Place the thread end between your thumb and forefinger
- Wrap the thread 2-3 times around your forefinger
- Roll the wrapped thread off your finger while ensuring the end goes through the loops
- Pull tight to form a secure knot
Slippery fabrics need extra security. You can loop the thread through the original wrap twice before pulling tight for a double knot.
Your thread tension needs to stay consistent throughout your work. Your left hand guides the fabric while your right hand maintains versatile control. This balanced approach creates even stitches without fabric puckering.
Regular breaks during sewing sessions prevent muscle fatigue. I work in 20-minute intervals and use these breaks to check my work while resting my hands. This practice keeps you comfortable and maintains your stitching quality.
Mastering Running and Basting Stitches
Running stitch and basting techniques are the life-blood of hand sewing. Your understanding of proper hand positioning and threading helps us take a closer look at these vital stitches. These stitches will become your gateway to more advanced sewing projects.
Step-by-Step Running Stitch Tutorial
The running stitch stands out as one of the most versatile and fundamental techniques in our sewing arsenal. This stitch opens up countless possibilities for both decorative and functional sewing. Here's a foolproof method:
- Bring your needle up through the fabric at your starting point
- Insert the needle back down through the fabric a short distance away
- Bring the needle up again at an equal distance
- Continue creating evenly spaced stitches along your desired line
Pro Tip: You can execute stitches faster by weaving the needle in and out of the fabric in one smooth motion. This technique works great especially when you have patterned fabric, as the needle's shaft helps maintain a straight line.
Basting Stitches and Their Uses
Basting stitches serve as your temporary helpers in the sewing world. These stitches are a great way to get multiple benefits:
- Testing garment fit before permanent stitching
- Holding slippery fabrics in place
- Replacing pins when working with bulky materials
- Creating temporary seams for complex projects
Hand basting beats machine basting with delicate fabrics or precise pattern matching. The extra time spent gives you better control and accuracy.
Common Mistakes and Fixes
My teaching experience shows several challenges that beginners face. The biggest problem is inconsistent stitch length. You should practice on lined fabric until you develop muscle memory.
Many sewers stitch directly on the seam line while basting. The better approach is to work slightly inside the seam allowance. This makes removal easier later. Cut the thread every five inches when removing basting stitches to prevent fabric damage.
Practice leads to perfection. Drawing guidelines with tailor's chalk helps if straight lines challenge you. The Japanese sashiko technique offers beautiful patterns using simple running stitches.
Important Note: Your basting stitches should use contrasting thread colors . This simple choice makes them easier to spot and remove later, saving time and reducing frustration in your sewing experience.
Advanced Hand Stitches
Let's build on those simple techniques and look at some advanced hand stitches that will lift your sewing projects to the next level. These techniques are a great way to get professional-looking finishes and add decorative elements to your work.
Backstitch and Slip Stitch Techniques
The backstitch stands out as one of the most versatile and durable hand stitches we can use. Its strength makes it special – it secures seams well and stays intact. Here's the quickest way to create a perfect backstitch:
- Start by bringing your needle up through the fabric
- Insert the needle behind the previous stitch
- Bring the needle out in front of the previous stitch
- Continue this pattern, creating small, even spaces between stitches
The prick stitch, a backstitch variation, works especially well when you have zippers to attach. The pick stitch creates nearly invisible stitches on the right side of the fabric and works great for hems.
Decorative Stitch Variations
My teaching experience shows that decorative stitches bring personality to any project. These options can transform your work:
- Chain Stitch: This creates flowing, curved lines and surface embellishments. It looks stunning on clothing, linens, and lingerie
- Cross Stitch: The oldest embroidery form shines when creating pictures and designs over fabric
- French Tack: This connects two garment sections while allowing independent movement, and works well between skirt hems and linings
Left-Handed Sewing Adaptations
Teaching many left-handed sewists has shown me their unique challenges. Right-handed users get most sewing equipment, but several adaptations work well.
Left-handed sewists should work from left to right across the fabric. This natural movement gives better control. They can hold the clear ruler with their right hand for rotary cutting, letting their skilled left hand do the cutting.
Specialized tools help some of my left-handed students succeed. Left-handed scissors cost more and might be hard to find, but they help struggling sewists. Many left-handed people adapt amazingly well – they become skilled at various techniques by adjusting their approach instead of switching tools.
The sort of thing I love about sewing is that each stitch type has its perfect use. Understanding when to use each one turns your projects from homemade to handcrafted. Practice and patience are your best friends here, regardless of which hand you use.
Machine Sewing Basics
The switch from hand sewing to machine sewing feels like entering a new world. My first time with a sewing machine left me puzzled by all its parts and pieces. Let me share what I've learned from teaching others over the last several years.
Understanding Your Sewing Machine
Your sewing machine should be a trusted partner in your creative experience. These are the main parts you'll use most often:
- The presser foot - keeps fabric in place as you sew
- The feed dogs - those small metal teeth that pull fabric through
- The bobbin system - creates the lower thread tension
- The tension disks - regulate upper thread flow
Your machine's manual will teach you everything you need to know. Different machines have their own features, but they all work on similar principles. The manual becomes your guide to learn about your specific model.
Basic Machine Maintenance
Taking care of your sewing machine is like maintaining a car - regular upkeep will extend its life by a lot. Here's my proven maintenance routine:
Daily Cleaning:
- Remove lint from feed dogs
- Clean the bobbin area
- Wipe the throat plate
- Check needle condition
It's worth mentioning that you should never blow into your machine to remove lint - this pushes debris deeper into the mechanism. A small brush or pipe cleaner works better to clean.
Starting each new project with basic maintenance makes sense. For bigger projects, I clean every time I change the bobbin. This simple habit has saved me money on repairs and prevented many problems.
Threading and Tension Adjustment
The right threading technique is vital for perfect stitches. Most tension problems come from wrong threading rather than tension dial settings. Here's what works every time:
- Thread with your presser foot UP - this seats thread properly in tension disks
- Guide thread through all thread guides before the needle
- Pull thread forward, never backward through tension disks
- Test tension on a scrap of your project fabric
Balanced stitches should look similar on both sides. Loops on top mean your upper tension is too loose. Loops on the bottom show too much upper tension.
Pro Tip: Keep a second bobbin case for special threads. This helps especially when you have different thread weights and don't want to adjust settings constantly.
Your machine needs professional servicing yearly. Regular cleaning and basic maintenance should continue between services. Strange sounds or uneven stitches usually signal that your machine needs attention.
A fresh needle starts every new project - at about 50 cents each, it's cheap insurance for professional results. The needle might be the least expensive part, but it can cause the most costly damage if ignored.
Essential Machine Stitches
Machine stitches are like a new language - each type tells its own unique story and serves a specific purpose. My experience teaching beginners has led me to develop a straightforward way to learn these vital stitches.
Straight Stitch Mastery
The straight stitch serves as your reliable companion - it's the simplest and most accessible stitch you'll use. Students need to become skilled at this stitch because it creates three popular canvas seams: overlapping, semi-flat felled, and full-flat felled seams.
The straight stitch stands out because it:
- Resists stretching
- Uses less thread than other stitches
- Blends into finished work
Pro Tip: Your stitch consistency improves when you focus on a point in front of your presser foot rather than watching the needle.
Zigzag Stitch Applications
BERNINA models introduced the zigzag stitch in 1938, and it has evolved into a versatile sewing tool. This stitch works great for:
- Creating seams or hems on knit fabrics
- Protecting raw seam edges
- Securing trim or lace
The zigzag stitch lets you adjust both length and width independently. Place the pin against the fabric edge to stabilize it and create a flat, reinforcing stitch.
Important Setting: The Overlock foot #2/#2A helps achieve smooth zigzag stitches without puckering. This works particularly well with stretchy materials.
Buttonhole Creation Tips
A systematic approach helped me overcome my nervousness about buttonholes. Today's machines offer various styles:
- Square buttonholes suit medium to heavy fabrics
- Rounded buttonholes work best with delicate materials
- Keyhole buttonholes accommodate thicker buttons
My reliable buttonhole process includes:
- Testing on fabric scraps first
- Adding interfacing behind the buttonhole area
- Marking the buttonhole's near end and opening slit
- Using the automatic buttonhole foot when available
Expert Tip: Durability improves with corded buttonholes. Run decorative cord through your buttonhole foot's guides before stitching - your machine will encase it automatically.
Pinning both ends before cutting buttonholes prevents accidental cuts through stitching. You can use a seam ripper or specialized buttonhole chisel set.
Balanced tension creates similar stitches on both fabric sides. Loose upper tension causes top loops while tight tension creates bottom loops.
My teaching experience shows that successful machine stitching depends on proper setup, regular practice, and knowing your machine's limits. Take time to learn - each stitch has unique characteristics that become familiar as you progress.
Conclusion
Sewing skills create endless possibilities for practical repairs and creative expression. Over the last several years of teaching, I've watched countless students grow from complete beginners into confident sewists by learning these simple techniques. Success comes from starting with proper tools, maintaining good posture, and practicing simple stitches consistently.
Learning these techniques is just the beginning - you need to apply them well in your projects. Professional-looking results depend on regular machine maintenance, proper tension adjustment, and choosing the right stitch for each task. Every skilled sewist started exactly where you are now.
These techniques will help you tackle more complex projects with confidence if you practice them regularly. Simple repairs make a great starting point before you move to more intricate work. The satisfaction of creating and fixing things with your own hands makes this a rewarding skill that will serve you well for years to come.


