Does unfolding a sewing pattern make you feel like you're facing a mysterious puzzle? You're not alone. Nearly two-thirds of beginners find pattern reading their biggest hurdle.
Most of us have stared at those cryptic lines, symbols, and instructions that look more like ancient hieroglyphics than helpful guides. Understanding sewing patterns and reading them correctly can turn your frustrating sewing trip into an enjoyable experience.
Pattern reading is your path to successful sewing, whether you're starting with simple projects or ready to take on complex ones. We'll show you how to decode pattern symbols and understand measurements that you need to use sewing patterns well.
Want to discover what makes sewing patterns tick? This complete guide will boost your confidence quickly.
Understanding Sewing Pattern Basics
Sewing patterns are the building blocks of garment creation. They work as your guide to making specific clothing pieces and give you all the pieces and instructions you need to build them.
What is a Sewing Pattern?
A sewing pattern works like a blueprint that helps you create clothes in the size you want. It's not just a paper template - it's your complete guide through the making process. The pattern gives you flat-drawn pieces to cut from fabric and shows you how to put them together. A basic t-shirt pattern shows this well - it comes with four main pieces: front, back, sleeves, and neckband, plus clear steps to assemble them.
Types of Sewing Patterns Available
The market offers two main types of sewing patterns:
- Commercial Patterns: Big companies like McCalls, Simplicity, New Look, Burda, Butterick, and Vogue make these in large quantities.
- Independent (Indie) Patterns: Smaller companies create these with better instructions and extra help through blog sewalongs.
Digital vs. Paper Patterns
Technology has changed the sewing world. Now we can choose between classic paper patterns and modern digital versions. Digital patterns are accessible to more people because they're quick to get and easy to use. Here's what makes each type special:
Paper Patterns:
- Come packed in envelopes with printed sheets and instructions
- Use tissue paper with sizes printed on top of each other
- Work best for traditional sewists
- Cost more because of making and shipping
Digital (PDF) Patterns:
- Download right after buying
- Print at home or take to a copy shop
- Come with size layers you can select
- Save money compared to paper patterns
Digital patterns let you print new copies whenever you need different sizes without damaging your original. Paper patterns give you that hands-on feel many sewists love, though they need gentle handling.
Essential Pattern Markings and Symbols
Understanding sewing pattern symbols feels like learning a new language. Let's decode these symbols and markings together to make your sewing experience smoother.
Common Symbol Guide
Pattern symbols are the foundations of successful project completion. Here's a look at the most common symbols you'll encounter:
- Grainline Symbol: A double-ended arrow that lines up fabric for proper drape
- Fold Lines: Marked by double-ended bent arrows showing where to place pattern on fabric fold
- Notches: Small triangles or diamonds for matching pieces (single notches for front, double for back)
- Buttonholes: Marked by short lines with bars at each end
- Darts: Triangular or curved shapes for molding fabric around body curves
Understanding Pattern Lines
Pattern lines serve different purposes, and each type has its own distinct appearance. These are the ones you'll use most often:
- Cutting Lines: Solid lines running along pattern edges
- Stitching Lines: Typically shown as dotted lines that indicate where to sew
- Adjustment Lines: Two parallel lines for lengthening or shortening pattern pieces
- Gather Lines: Usually marked by dots or wavy lines between two points
Size and Measurement Markings
Size-related markings ensure a proper fit and are vital for professional results. Pattern pieces include specific indicators for bust points, waistlines, and hip measurements. These markings help you:
- Match body measurements accurately
- Line up pattern pieces correctly
- Make size adjustments as needed
- Ensure proper garment fit
Water-soluble markers or tailor's chalk work best for transferring these markings to fabric. Small snips (about 3mm) into the seam allowance effectively mark notches.
Note that each pattern company's symbols might differ slightly, but they always provide a key or legend explaining their specific markings. Reading this information before starting any new project will set you up for success.
Navigating Pattern Instructions
A new sewing pattern feels like getting a treasure map - exciting but maybe even intimidating! My experience with patterns of all types will help you navigate these instructions with confidence.
Reading Pattern Envelopes
The pattern envelope serves as our first introduction to any new project. These significant elements need checking on a pattern envelope:
- Front envelope: Shows style variations (called "views")
- Back envelope: Has detailed project descriptions
- Fabric requirements and suggestions
- Notions list (buttons, zippers, etc.)
- Size charts and finished measurements
- Pattern piece inventory
Pattern envelopes provide everything needed before starting a project. The back of the envelope is a vital reference that has specific details about fabric quantities and notions for each view.
Understanding Layout Guides
Layout guides work like roadmaps to position pattern pieces on fabric. Several key aspects matter when working with layout guides:
The pattern gives exact positioning instructions for pieces on your fabric. Most patterns need fabric folded in half, and cutting layouts show both the fold and selvages as reference points. The grainline must run parallel to the selvage, so measuring at several points ensures accuracy.
The sort of thing I love about proper layout: "a project that is well prepared is 50% done". The suggested layouts work well, but sometimes adjusting them helps maximize fabric usage while maintaining proper grain arrangement.
Following Step-by-Step Instructions
The instruction booklet sits inside the pattern packet. What might seem daunting becomes quite straightforward when broken down properly. The instructions have:
- Pattern piece inventory
- Glossary of sewing terms
- Fabric cutting layouts
- Step-by-step construction guide
Reading through all instructions before starting makes a difference. Modern patterns come with detailed diagrams or illustrations for each step. Unfamiliar terms shouldn't worry you - the instruction booklet includes a glossary, and additional help exists online.
Markings for dart positions, sleeve placement, and fastening locations need special attention to achieve professional results. Note that even experienced sewists frequently check their instructions throughout projects - this practice helps ensure success!
Choosing the Right Pattern Size
Pattern size selection plays a significant role in creating well-fitting garments. My experience shows that proper preparation begins before any fabric or pattern pieces come into play.
Taking Body Measurements
Accurate measurements serve as the foundation of successful sewing. The person being measured should wear proper undergarments and remove bulky clothing. Measurements taken over items like jeans or padded bras can lead to an oversized final garment.
My essential tips to achieve accurate measurements:
- Keep the measuring tape taut but not tight
- Measure with intended undergarments
- Take measurements at regular intervals
- Have someone help when possible to achieve better accuracy
- Record measurements to reference later
Understanding Size Charts
Pattern sizing often surprises newcomers to sewing. It's worth mentioning that your pattern size will differ from your ready-to-wear clothing size. To name just one example, someone wearing a 12-14 in store-bought clothing might need a pattern size 20-22.
Commercial patterns base their sizing on three key measurements:
- Bust (or high bust for better fit)
- Waist
- Hip
Size charts reveal both body measurements and finished garment measurements. This insight helps determine how much ease (extra room) the design includes.
Selecting Between Sizes
Measurements often fall between sizes. If your bust measurement indicates size 14, but your waist measurement suggests size 16, the larger size works better. The reason is simple - we can reduce fabric but can't add what isn't there.
Understanding positive and negative ease is vital when selecting sizes. Positive ease means the finished garment exceeds your body measurements - this allows movement in woven fabrics. Negative ease, typical in stretch fabrics, means the finished garment measures smaller than your measurements.
Fitted garments require checking the finished garment measurements on pattern pieces. This helps determine whether to size up or down based on fit preference. Note that pattern companies create from their unique 'blocks' to draft patterns, so sizes may vary across brands.
Pattern Preparation Steps
The right pattern size needs proper preparation and organization to ensure successful sewing. My years of experience taught me that well-prepared patterns prevent countless headaches down the road.
Organizing Pattern Pieces
A clean, flat surface works best to lay out all pattern pieces. This simple step helps me check if anything's missing. PDF patterns work better when pieces are sorted by garment section (bodice, sleeves, skirts).
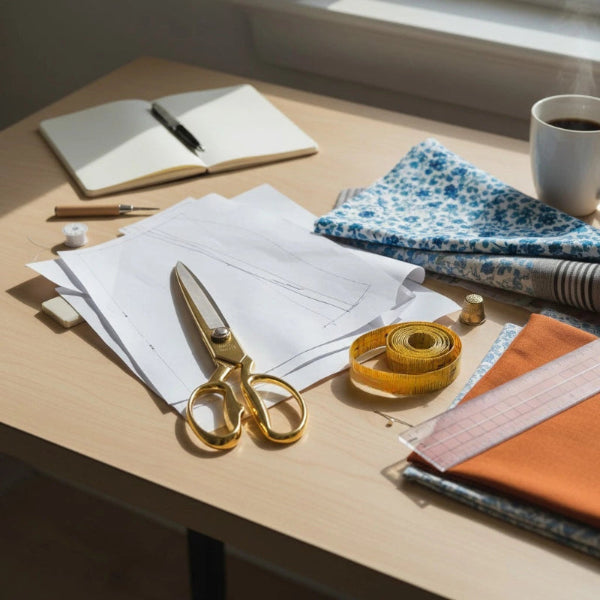
These tools should be within reach for pattern preparation:
- Tracing paper or Swedish tracing paper
- Sharp pencils and erasers
- Ruler and measuring tape
- Pattern weights or heavy objects
- Sharp scissors (paper-only pair)
- Storage containers or envelopes
Tracing and Cutting Tips
Original patterns are too valuable to cut directly - they're expensive and you'll lose access to other sizes. My proven tracing process looks like this:
- Lay out pattern on flat surface
- Place tracing paper over pattern
- Secure with pattern weights
- Trace outline carefully with pencil
- Add all markings and labels
- Double-check measurements
- Cut traced pattern precisely
A tracing wheel helps with curved lines, or you can make small dots along the curve for accuracy. Rulers give you precise straight lines. Every marking needs to be transferred - notches, darts, grainlines, and sizing information.
Pattern Storage Solutions
Proper storage is a vital part of pattern longevity. Pattern preservation depends on five main factors:
- Heat (keep below 75 degrees F)
- Humidity (maintain 45-55%)
- Light exposure
- pH levels
- Environmental fluctuations
Clear plastic envelopes with snap closures fit perfectly in my drawers. This setup lets patterns stay loosely folded instead of crammed into tiny original envelopes. A photo of the finished garment and fabric swatch on the outside makes quick reference easy.
Digital patterns need both online and physical organization. Digital files stay in labeled folders on my computer, while printed versions go into labeled envelopes or folders. Storage boxes combined with filing systems work great, especially when sorted by garment type or pattern number.
Temperature and humidity control make a big difference in preservation. Basements, attics, and garages create too many condition changes. A climate-controlled room with good air circulation, away from sunlight, protects patterns better.
Note that clear labels save time - I mixed up similar-looking pattern pieces once and learned my lesson! My simple cataloging system tracks pattern numbers, sizes, and modifications. Finding specific patterns becomes much easier for future projects.
Common Pattern Reading Mistakes
My years of teaching sewing have taught me something interesting - even skilled sewists can get tripped up by pattern reading. Let me share the most common mistakes I see and show you how to steer clear of them.
Avoiding Size Selection Errors
The biggest problem I face when teaching new sewists is explaining why store-bought clothes sizes don't match commercial pattern sizes. Many people pick a size from the pattern envelope without measuring and end up with something 2-3 sizes too big. Commercial patterns tend to run large, which makes their size charts quite misleading.
My proven method for picking the right size includes:
- Getting exact body measurements
- Starting with bust size for the best fit
- Looking at fabric type and needed ease
- Taking design elements into account (like cowl necklines)
- Looking at finished garment measurements
Body measurements might fall into different size ranges, but I tell my students to go with the bust measurement since other areas are easier to adjust.
Pattern Marking Mistakes
A well-planned project can go wrong quickly because of pattern marking errors. Many sewists skip transferring all markings because they think they'll add them later or just remember them. This creates confusion and mistakes during the making process.
Pattern trueing is vital - it means all seams fit together perfectly. You might be surprised, but even commercial patterns sometimes have trueing problems. Here's what I do when seams don't line up:
- Put pattern pieces together like you're sewing them
- Match up notches and walk the pattern
- Look for seam length differences
- Split any differences between pieces
- Fix pattern lines as needed
Layout and Cutting Issues
Rushing through prep work causes most layout and cutting mistakes. Small errors add up fast and can really affect your final product.
My students' most common layout mistakes are:
- Not following grain lines
- Skipping fabric direction checks
- Cutting without stabilizing
- Rushing pattern placement
Brown paper under your fabric helps with tricky materials. Professional sewists use this trick to keep fabric from moving while cutting. For striped or plaid fabrics that need to match, I line up the stripes on both layers for the entire length.
Skipping pattern instructions happens more than you'd think. We sometimes assume we know how pieces fit together without reading the directions. Each pattern might have unique construction methods that differ from what we know.
Teaching has shown me that incorrect patterns make people quit sewing. When a garment turns out wrong and sewists trusted the pattern, they blame themselves. That's why checking pattern pieces and instructions before cutting is so important.
Digital patterns need special attention - always measure that test square. I've seen prints come out at 98% or 105%, causing major size issues. These small differences add up across pattern pieces and can make garments noticeably wrong-sized.
Pattern companies sometimes publish corrections or "errata". If something seems off, check their website or reach out directly. Many indie pattern makers will email corrections to customers who bought patterns with issues.
Conclusion
Sewing patterns might look complex at first, but I've watched countless sewists become skilled at them through proper guidance and practice. My experience teaching and working with patterns has shown that success comes from understanding the simple elements, paying attention to details, and preparing properly.
You'll find pattern reading becomes natural once you learn the fundamental elements - from simple symbols to size selection and preparation techniques. It's worth mentioning that experienced sewists double-check their measurements and review instructions carefully before they start new projects.
Original challenges shouldn't discourage you. Every sewist's story begins somewhere, and each project builds confidence and skills naturally. This guide will serve as your reference. Simple patterns make great starting points, and your sewing abilities will grow with each finished project.
Commercial or indie patterns, digital or paper formats - your sewing experience becomes more rewarding when you understand how to read and use patterns well. Accurate measurements, organized patterns, and careful marking transfers will make your future projects smoother. Your future self will appreciate this attention to detail.
FAQs
Q: What exactly is a sewing pattern?
A: A sewing pattern serves as a template from which the parts of a garment are traced onto fabric before being cut out and assembled. It is essential in the process of creating clothing.
Q: Can you explain what PDF sewing patterns are?
A: PDF sewing patterns are digital versions of traditional printed patterns. Imagine taking a printed pattern on tissue paper, cutting it into letter-sized pieces, and then scanning each piece to create a digital file. That's essentially what a PDF sewing pattern is.
Q: What is the recommended PDF reader for sewing patterns?
A: PDFelement is highly recommended for opening and viewing PDF sewing patterns. It offers numerous built-in features that can enhance your experience, especially if you encounter any issues with opening the PDF files.
Q: What are the three main components of a pattern?
A: A pattern typically consists of three main parts: elements, repetition, and structure. Elements are the basic forms, repetition refers to how these elements are repeated, and structure describes their arrangement, creating a cohesive visual design.
Q: How do you use PDF patterns with a regular home printer?
A: To use PDF patterns with a home printer, you print the pattern on regular paper. After printing, you will need to tape the pieces together to form the full-size pattern. This process allows you to assemble the pattern at home easily.


