Did you know that becoming skilled at just three advanced sewing techniques can turn 80% of your projects from "homemade" to "professionally crafted"?
Many of us have faced this moment - we stare at a complex pattern and wonder if we have the skills for those intricate details. Through years of teaching sewing workshops, I've seen countless sewists reach a plateau after learning the simple techniques. They often struggle to advance their skills further.
Your path to advanced sewing skills doesn't require more patterns or fancy equipment. Professional tailors use specific techniques daily, and these are the foundations of exceptional work. These advanced sewing techniques will make all the difference whether you dream of creating couture garments or want to raise your craftsmanship.
Would you like to take your sewing from simple to exceptional? This piece will show you everything from professional fabric handling to couture finishing methods. Let's thread our needles together and begin!
Essential Tools and Equipment for Advanced Sewing
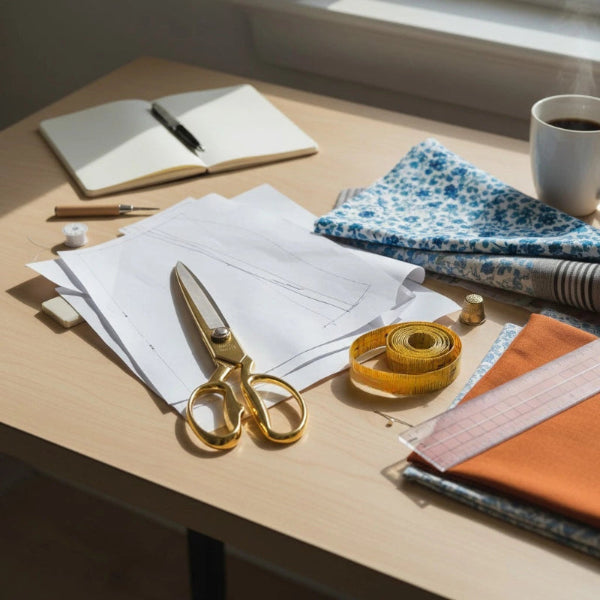
Advanced sewing requires the right tools to achieve professional results. Let me share the equipment that will lift your sewing skills to new heights.
Professional-Grade Sewing Machines and Features
Your choice of machine lays the groundwork for advanced sewing. Industrial sewing machines deliver impressive speeds of 300 to 5,000 stitches per minute. Domestic machines typically max out at 800 stitches per minute. Domestic machines give you versatility with 50 to 200 built-in stitches, while industrial machines excel at precision and specialization.
Industrial machines stand out with challenging materials. They handle multiple layers of heavy fabrics like denim and leather with consistent stitch quality. These powerhouses come with resilient cast iron frames and hardened steel parts built for daily heavy use .
Specialized Tools and Notions
Advanced sewing projects need more than simple supplies. Here are the tools I recommend:
- Professional-Grade Shears: High-quality metal scissors that cut through multiple fabric layers
- Rotary Cutting System: A rotary cutter with self-healing mat for precise cutting
- Edge-Joining Foot: Perfect for parallel stitches
- Walking Foot: Handles multiple layers evenly
- Specialized Marking Tools: Leaves temporary marks without fabric damage
Setting Up an Efficient Workspace
A well-laid-out sewing space makes advanced projects smoother. The "prime real estate" approach works best - keep your frequent tools within reach without cluttering your view.
Your workspace needs:
- A power tower with multiple outlets and USB ports for various tools
- Clear acrylic containers to store notions visibly
- Proper lighting with adjustable task lamps
- A dedicated cutting table at comfortable height
- Specific zones for different tasks (cutting, pressing, sewing)
A well-organized workspace helps maintain professional standards. A built-in power strip in your sewing cabinet changes everything - you can switch between machines and tools quickly .
Mastering Advanced Pattern Techniques
Over the last several years of teaching advanced sewing skills, I found that there was becoming skilled at pattern techniques that helps sewists raise their craft. Let me share everything in techniques that revolutionize my students' work from simple to professional.
Pattern Grading and Sizing
My students learn that accurate pattern measurements are the foundations of professional results. Pattern measurements require focus on these significant points:
- Shoulder width
- Center back neck to waist
- Bust circumference
- Waist measurement
- Hip circumference
- Bicep girth
The relationship between pattern measurements, body measurements, and design ease will eliminate the trial-and-error fitting process most of us use.
Complex Pattern Alterations
The sort of thing I love is pattern walking. This method will give a seam line accuracy after design or fitting adjustments. Here's my proven process:
- Check corresponding pattern pieces
- Verify matching seam lengths
- Confirm notch placement
- Check dart positions
- Review grain lines
Dart manipulation is a vital skill especially when you have pattern designers, though garment makers using commercial patterns will find it valuable. This skill helps us transform basic patterns into style patterns without changing the fit.
Creating Pattern Modifications
Pattern modifications require truing darts. This refinement prevents dart points from pulling and puckering. Blending seam lines plays an equally vital role - we use it to transition a broken seam line smoothly between areas.
Pattern grading becomes easier by a lot when you understand how the human body grows in different areas. To cite an instance, a woman's body grows more in width than height, and the bust and waist expand more than neck and shoulder. This knowledge helps achieve better results when grading between sizes.
Complex modifications work best with a basic sloper - a fitting pattern designed for specific body measurements. This approach has saved my students countless hours of guesswork in their custom alterations. Note that bodice adjustments will affect both the armhole and shoulder fit since these pieces connect to each other.
Professional Fabric Handling Methods
A secret changed my advanced sewing experience: your ability to handle fabric distinguishes professional results from amateur work. My years of experience taught me that even difficult fabrics become manageable with the right techniques.
Working with Challenging Fabrics
Success with difficult fabrics starts by understanding their unique traits. Ultra-fine (80 wt) polyester thread and a Microtex needle give the best results with silk charmeuse. Plush fabrics work best with a jersey/ballpoint needle and walking foot to prevent movement.
These challenging fabrics need specific handling:
- Vinyl and Leather: Requires non-stick feet and longer stitch lengths
- Silk and Taffeta: Just needs ultra-fine needles and gentle handling
- Neoprene/Scuba: Benefits from reduced presser foot pressure
- Carbon Fiber: Needs titanium-coated needles for durability
Advanced Cutting Techniques
Each fabric demands its own cutting approach. Water jet cutting works best for delicate fabrics because it's gentle on heat-sensitive materials. Synthetics respond well to ultrasonic cutting that cuts and seals edges at once.
Laser cutting has revolutionized intricate design work. This method creates detailed lace patterns and complex cut-outs in high-fashion garments. Proper cutting ensures fabric pieces fit together and keeps the material's integrity intact.
Fabric Preparation and Testing
A vital preparation process precedes any cutting. The grain lines need realignment if you see a weird bubble while folding the fabric. Woolens shrink best in the dryer on low heat with damp towels, which releases moisture and shrinks fibers evenly.
New fabrics require these tests:
- Check the drape behavior
- Test stretch in both directions
- Verify weight and folding characteristics
- Assess sheerness for lining needs
Good fabric preparation prevents fit issues and misalignments in your final garment. Polyester batting placed under vinyl fabric stops sticking and helps it feed through the machine smoothly.
Note that fabric handling goes beyond cutting and sewing - it's about knowing each material's behavior and adjusting your techniques. The right preparation and handling turn challenging fabrics into opportunities for creating exceptional pieces.
Advanced Construction Techniques
My skills in fabric handling and pattern techniques have grown, and I found that advanced construction methods make professional garments stand out. These techniques changed my sewing practice completely.
Complex Seam Finishes
Professional work taught me that a good seam should look smooth and even from both sides, with consistent width throughout. My seams always include:
- French Seams: Perfect for delicate fabrics, completely enclosing raw edges
- Flat-fell Seams: Ideal for sportswear and heavy-duty items
- Bound Seams: Essential for unlined jackets and formal wear
- Hong Kong Finish: Excellent for thick or bulky fabrics
Hairline seams work exceptionally well with sheer fabrics, particularly around collars and enclosed areas. Bias bound finishes add strength and visual appeal to exposed seams on the inside of garments.
Professional Interfacing Methods
Experience taught me that interfacing is vital to achieve professional results. The interfacing weight should match or be slightly lighter than your fabric. Here's my tested process to apply interfacing perfectly:
- Feel for the adhesive side (it has a slightly raised texture)
- Test on fabric scraps first
- Apply with a damp pressing cloth
- Press, don't glide the iron
- Let it cool completely before moving
Fusible interfacing works great on most projects, but sew-in interfacing gives better results with textured fabrics or loose weaves. Lightweight non-woven interfacing suits knits best because it stabilizes while keeping some stretch.
Advanced Closure Techniques
The invisible polo closure ranks among my favorite advanced techniques, especially with printed fabrics. Concealed buttons and buttonholes create fluid, unbroken lines that lift any garment.
Featherboning anchors plunging necklines securely to prevent wardrobe malfunctions. Wide square necklines need featherboning cut one inch longer than the neck front edge for the best support.
Silk blouses and thin fabrics get that couturier finish when constructed with proper lining or underlining. Raw edges stay exposed at neck and armholes. This approach makes my work look professional rather than homemade.
Snaps sewn between buttons on plackets prevent gaping - a small detail that makes a big difference in how the garment looks. Bulky fabrics look better when I move the facing underarm seam toward the back to reduce bulk.
Couture Finishing Methods
The true mark of excellence in haute couture lies in the finishing touches. My time in prestigious ateliers has taught me that most technicians craft garments by hand with close attention to detail.
Hand-Sewn Details
Hand sewing gives exceptional control over garment construction, especially when you have areas machines can't reach. The delicate fabrics look better with hand stitching because it leaves nowhere near as many marks as machine seams. These hand stitches help create that coveted couture finish:
- Running Stitch: Perfect for basting and thread tracing
- Hand Overcasting: Ideal for edge-finishing unlined garments
- Catch Stitch: Essential for securing facings and hems
- Flat-Fell Stitch: Excellent for securing linings
Professional Hemming Techniques
Over the last several years, I've learned that the right hemming technique can make or break a garment. The professional finish comes from evenly distributed fullness and perfectly spaced stitches. Fine fabrics work best with the double-fold hem method that creates a clean, professional finish without visible raw edges.
French seams work beautifully on lightweight or sheer fabrics and provide a clean finish without needing a serger. Hong Kong bindings add strength and visual interest to heavier materials' inside edges.
Decorative Finishes
Seam finishes substantially improve a garment's appearance and durability. Note that a truly professional piece should look as beautiful inside as outside.
The fabric type determines which finishing techniques work best for unlined garments:
- High-Fraying Fabrics: Self-bound or turned-under techniques that completely enclose raw edges
- Medium to Low-Fraying: Simple edge finishes with zigzag or serging stitches
- Special Materials: For suede or leather, edges are typically left unfinished
Bias bound seams create visual interest in the garment's interior while adding remarkable strength. The "burrito method" helps create clean finishes on both sides of yokes, waistbands, and cuffs in challenging areas.
"Couture sewing is sewing without shortcuts - it's the sewing equivalent of gourmet cooking". Taking time with these finishing methods turns simple garments into true works of art.
Advanced Fitting and Alterations
My decades of professional tailoring experience taught me that advanced fitting and alterations are the life-blood of creating exceptional garments. These techniques changed how I achieve perfect fits.
Complex Fitting Adjustments
The relationship between measurements and movement forms the foundation of successful fitting. My clients stand naturally during measurements. This gives me the most accurate baseline. Fitting works like solving a puzzle - each adjustment affects how the entire garment balances.
My proven measurement process includes:
- Take original measurements with a helper
- Add appropriate ease allowances
- Compare measurements to pattern specifications
- Make preliminary adjustments
- Test fit with a muslin
- Fine-tune adjustments
Working with Different Body Types
Patterns should fit the shoulders first, then you can adjust everything else. The garment's fit depends on three vital elements - circumference, balance, and shaping.
Different body shapes need attention to these factors:
- Circumference: Proper ease for movement
- Balance: Garment's hanging position
- Shaping: Dart and seam adjustments for contouring
- Proportion: Visual harmony
My clients perform normal activities during trial fittings. They sit, walk, and move naturally. This helps me spot fitting issues that aren't visible while standing still.
Fixing Common Fitting Issues
Years of experience helped me develop reliable solutions for common problems. The waistband often needs adjustments for waisted shapes (X, A, and 8). Garments should fit the largest body part first. Taking in fabric works better than letting it out.
Balance plays a key role in garment fit. A twisted skirt usually means the waist needs adjustment. The bust point must sit correctly - otherwise, darts won't lie flat.
Here are my techniques for different fitting challenges:
For Bust Adjustments:
- Full Bust Adjustment (FBA) for cup sizes larger than B
- Small Bust Adjustment (SBA) for smaller cup sizes
- Dart manipulation shapes properly
For Shoulder Fitting:
- Shoulder slope adjustments improve drape
- Width modifications line up correctly
- Front and back measurements balance
Experience taught me that fitting creates harmony between garment and body. Each person's unique proportions need individual attention. There's no "standard" body type.
Conclusion
True sewing mastery depends on understanding and practicing core techniques rather than accumulating patterns or equipment. Professional results come from careful attention to workspace setup, pattern adjustments, fabric handling, and fitting methods. I've learned this through years of hands-on experience.
Expert sewists create exceptional work because they deeply understand construction methods and finishing details. The techniques we explored - from intricate seam finishes to couture hand-sewing - build on simple skills to produce remarkable garments.
Your journey to become skilled at advanced sewing needs patience and consistent practice. Begin by organizing your workspace and focus on one new technique at a time. A commitment to proper tools, precise patterns, careful fabric handling, and professional finishing will elevate your creations from simple projects to masterful pieces that highlight true craftsmanship.
FAQs
Q: What skills are considered advanced in sewing?
A: Advanced sewing skills include techniques such as edge stitching and under stitching, which are crucial for achieving professional-looking seams and flawless finishes. Practicing these skills diligently to maintain even stitches and consistent seam allowances is essential.
Q: How much time is required to become proficient in sewing?
A: Learning the basics of sewing typically takes about two to three weeks. However, the time to master sewing can vary greatly depending on the method of learning. Self-learning through books and online resources may take longer and requires more self-discipline compared to structured, guided learning.
Q: What steps can I take to enhance my sewing abilities?
A: To improve your sewing skills, ensure you are well-prepared with the right materials and tools, and understand how to use them effectively. Always read and follow instructions carefully, take advantage of your sewing equipment's features, accept that mistakes are part of the learning process, pay attention to details, and assess your skills realistically to set achievable goals.
Q: What is considered the most challenging material to sew?
A: Thick materials like leather or canvas are particularly challenging to sew. They require a heavy-duty sewing machine equipped with a powerful motor. Using a specialized needle, such as a leather or denim needle, is also advisable to handle these tough fabrics effectively.
Q: What is the best approach to learning advanced sewing techniques?
A: The most effective way to learn advanced sewing techniques is through a combination of practice, seeking guidance from more experienced sewers, and utilizing advanced learning resources such as workshops, detailed tutorials, and comprehensive sewing books. Engaging with a community, either online or in-person, can also provide support and insights as you develop your skills.


