A surprising 40% of home sewists abandon their projects because patterns don't fit properly.
Most of us share this experience. The excitement of starting a new sewing project quickly fades when the standard pattern refuses to match our measurements. Nothing feels worse than discovering a size 12 pattern fits perfectly at the bust but pinches at the hips. Those pants legs that fall short by a few inches can be equally disappointing.
The ability to alter sewing patterns helps create garments that fit and flatter your unique body shape. Pattern alteration gives you complete control of your sewing projects, whether you need to increase the size, adjust the length, or make comfort modifications.
This piece offers beginner-friendly techniques to alter patterns, from simple measurements to common adjustments. You'll gain enough confidence to handle any pattern modification challenge after reading through. Ready to begin?
Essential Tools and Materials for Pattern Alteration
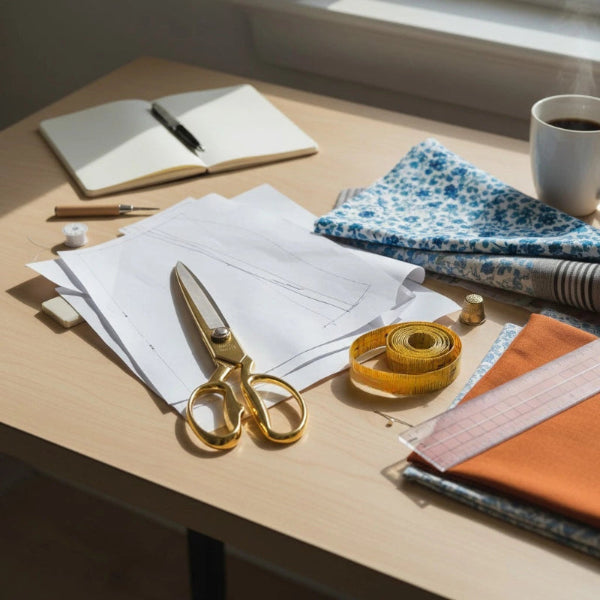
Let's talk about the right tools you need to alter patterns. You probably have some of these in your sewing kit already!
Simple measurement and marking tools
Precise measuring and marking are the foundations of successful pattern alterations. Here's what you'll need:
- A clear 18-inch ruler with grid markings to make accurate straight lines and seam allowances
- A flexible measuring tape that works well with curves
- Mechanical pencils (0.5mm) to mark precisely
- Quality erasers that won't harm your pattern paper
- French curves to create smooth necklines and armholes
Pattern paper and tracing supplies
Different types of paper work best at various stages of pattern work:
- Dotted marking paper: Complex alterations become easier with its built-in grid system
- Manila pattern paper: Your final patterns will last longer on this durable paper
- Simple white kraft paper: Perfect to practice and make your first drafts
Your tracing work needs these tools:
- A tracing wheel with sharp spikes
- Matte transparent tape (skip the shiny gift-wrap tape since it's hard to write on)
- Pattern weights to keep everything in place
Fitting aids and references
These tools are a great way to get accurate alterations:
- A dress form to check fit adjustments (skip adjustable forms if you plan to drape)
- Pattern notcher to mark reference points
- Pattern hooks to store everything properly
- Draping tape (1/8" wide black tape works best) to mark style lines
Note that you don't need to buy everything right away. Start with the basics - a good ruler, measuring tape, and pattern paper. You can build your collection as your skills improve.
Understanding Pattern Sizing and Measurements
Pattern alteration becomes easier once you understand how sizes work in the sewing world. Many sewists find it surprising that their regular clothing size differs from their pattern size.
How to read pattern size charts
Commercial patterns display two significant sets of measurements on the envelope: Body Measurements and Finished Garment Measurements. The difference between these measurements matters. Body measurements reflect your actual size and finished measurements show the final garment dimensions.
Store-bought clothes and sewing patterns differ mainly in ease - the extra space that allows comfortable movement in garments. Most patterns add 2-3 inches of ease in their finished measurements.
Taking accurate body measurements
The best practice involves taking measurements while wearing the undergarments you plan to use with the final garment. These tips help achieve accurate measurements:
- Stay relaxed with the tape snug but not tight
- Repeat measurements to ensure consistency
- Ask a friend's help with hard-to-reach areas
- Put on form-fitting clothes during measuring
Comparing measurements to pattern pieces
The process starts by matching your body measurements to the pattern's size chart. Your measurements might span different sizes - a size 8 waist with size 12 hips happens often.
Upper bust measurement works better than full bust as a size guide for tops and dresses. This method creates a better fit around shoulders and neckline. Hip measurements guide the size selection for bottoms.
Finished garment measurements help determine the perfect fit. These numbers show exactly how much ease the final garment will have. The larger size makes a better choice if you fall between sizes. Taking in a garment proves much easier than letting it out.
Pro tip: Pattern pieces need careful attention to seam allowances in calculations. The actual sewing lines determine the final garment size.
Preparing Your Pattern for Alterations
Success in pattern alteration starts with proper preparation. Experience shows that rushing this stage creates frustration later, so let's break it down step by step.
Tracing the original pattern
The original pattern must be preserved at all times. A new paper tracing allows multiple attempts at alterations if needed. Here's our proven tracing process:
- Smooth the pattern pieces completely flat
- Pin darts and pleats as if sewn
- Extend grainline markings for clear visibility
- Transfer all markings, including notches and darts
- Label each piece with size and cutting instructions
Identifying adjustment points
Pattern pieces need measurement at points that match our body measurements before making changes. The core team always checks these areas:
- Bust, waist, and hip points
- Shoulder and neckline positions
- Sleeve length and circumference
- Dart positions and angles
Measurements should go from seamline to seamline while carefully following the pattern's curves. The tape measure works best when turned on its side for accurate measurements in sharp curves like the crotch area.
Making a test muslin
A test garment (muslin) helps achieve the perfect fit. This step might seem like additional work to be done, but it saves time and fabric eventually.
The muslin only needs the key pattern pieces - no facings or linings. A long machine basting stitch makes removal easy if adjustments are needed. Carbon paper and a tracing wheel help mark all seamlines clearly on the muslin for fitting purposes.
Alterations should happen one at a time. Start with lengthwise adjustments at the shoulder or neck and work downward. This organized approach prevents the common mistake of making too many changes simultaneously.
Pro tip: The neck and shoulder area's correct fit often resolves fit issues in side seams or bust areas.
Basic Pattern Adjustment Techniques
Pattern adjustments are easier than you might think! At the time we started, we noticed that adjustments typically fit into three simple categories. Once you become skilled at these fundamentals, you can handle almost any fitting challenge.
Lengthening and shortening
Length adjustments are the quickest changes we make to patterns. Our research shows that bodices need about 3/8" adjustment per size. Here's the quickest way to do it:
- Locate the lengthen/shorten lines on your pattern
- Cut along these lines
- Add paper underneath
- Spread for lengthening or overlap for shortening
- Blend the side seams smoothly
Trouser adjustments need special attention to both rise and leg length. The front pieces must match any length you add to the back pieces to ensure a proper fit.
Adding or reducing width
The "slash and spread" or "slash and overlap" technique works best to adjust width. This approach preserves the pattern's proportions and lets you make precise changes.
You can make patterns wider by cutting along predetermined lines and spreading them to add width. Keep the grainline parallel to the center front. The pattern pieces should overlap carefully during width reduction without distorting the original design lines.
Working with darts and seams
Darts transform flat fabric into three-dimensional shapes. They help you:
- Create curves around the bust
- Shape the waist
- Add structure to shoulders and elbows
Darts should point toward the fullest part of the area they shape. The bust darts work best when they end about 1-1.5 inches from the apex.
Dart manipulation gives you amazing flexibility. You can close one dart and open another to add fullness where needed. This works great especially when you have different body shapes and sizes.
_Pro tip: Balance is crucial - make matching changes to both front and back pattern pieces._
Common Fitting Issues and Solutions
Reading wrinkles is our best tool to diagnose fitting issues. Let's look at how we can spot and fix common fitting problems together.
Diagnosing fit problems
Garments tell their story through visual cues. Fitting experts say drag lines and wrinkles show us what's wrong most often. These signs tell different stories:
- Horizontal wrinkles mean the garment needs more length
- Diagonal lines point to pulling or tightness
- Vertical folds show too much fabric
- Necklines or armholes that gap mean things don't line up right
Books like "Fit for Real People" and "The Perfect Fit" are a great way to get help in reading these signs. These guides show us that what looks like a simple shoulder problem might actually come from a thick neck base or other fit challenges.
Making multiple adjustments
A systematic approach works best for multiple fitting issues. Experience shows top-to-bottom adjustments give the best results. Here's what works:
- Start with length adjustments
- Address shoulder and neckline issues
- Make bust adjustments (if needed)
- Tackle waist and hip modifications
- Fine-tune sleeve fit
Changes often affect other areas. To cite an instance, a Full Bust Adjustment (FBA) changes the waist and might need a swayback adjustment too. This is why we make one change and check its effects before moving on.
Testing and refining changes
Perfect fit comes from testing and refining patiently. This needs close attention to detail. Our testing includes:
- Fresh muslin after each major change
- Photos from many angles
- Fit checks while moving, sitting, and standing
- Notes on all adjustments for later use
The right fabric matters a lot for testing. Muslin that matches our final garment's properties shows us the best preview. A perfect mirror fit might feel tight when moving, so we do a "movement test" - we sit, reach, and walk in our test garment.
We've learned not to over-fit. The urge to fix every tiny wrinkle is strong, but clothes need room to move. Finding the sweet spot between good looks and comfort matters most.
Pattern alteration mixes art with science. Each body tells its own story, and fixes that work for one person need tweaks for another. Being organized about spotting problems, making changes, and testing helps us create clothes that fit and flatter our unique shapes.
Conclusion
Pattern alteration helps transform standard sewing patterns into perfectly fitted garments that celebrate our unique body shapes. Our experience with understanding measurements, preparing patterns, and becoming skilled at simple adjustments has found that there was a strong connection between technical skill and patient practice.
Proper preparation makes all the difference. You need the right tools and test muslins. Our systematic approach to identifying fit issues and making adjustments shows that complex alterations become manageable when broken down into steps.
Pattern alteration is a skill that grows with each project you complete. The first few adjustments might take time, but each attempt builds confidence and expertise. You can start with simple length adjustments and move to width modifications before tackling complex fitting challenges.
The learning process deserves acceptance, and perfection takes time. The right tools, accurate measurements, and systematic testing will help you create garments that fit and flatter your unique shape and express your personal style.
FAQs
Q: How can I make sewing patterns fit me perfectly?
A: To ensure a perfect fit, start making adjustments from the top of the pattern, such as the shoulders, and work your way down. This approach helps in minimizing the number of adjustments needed later. Always test your adjustments on a muslin model before cutting your final fabric to avoid mistakes.
Q: What is the simplest method to resize a sewing pattern?
A: The "slash and spread" technique is highly recommended for resizing patterns. This involves making horizontal and vertical cuts on the pattern piece at the points where you need to increase or decrease the size, and then spreading the pieces apart or overlapping them to adjust the size.
Q: In what sequence should sewing pattern adjustments be made?
A: Begin with the most significant changes first, such as adjusting the length of the pattern. Next, modify the width at key areas like the bust, waist, and hips if needed. After making these adjustments, sew a toile or muslin to check if further refinements are necessary.
Q: How should I lay out a sewing pattern on fabric?
A: Start by aligning the selvage edges of the fabric accurately to ensure they are smooth and free from diagonal wrinkles. This setup is crucial for the correct orientation and grain of the fabric when you begin cutting.


