A surprising statistic shows that 62% of new sewers abandon their craft after completing just one project.
Tangled threads, crooked stitches, and complicated patterns can overwhelm newcomers to sewing. The reality is that sewing isn't as complex as most people think.
Sewing opens up possibilities. You might want to design your own wardrobe, repair a beloved shirt, or discover a creative outlet. Success comes from understanding simple techniques first. The process resembles learning to ride a bike - practice and good guidance make everything easier.
Our complete guide will help you begin your experience with confidence. We'll guide you through each step, from selecting your first sewing machine to finishing your initial project.
The needle awaits - are you ready to create something amazing? Let's begin!
Essential Sewing Supplies for Beginners
Your sewing toolkit can make the difference between frustration and success. Let's build one that works for you!
Simple Tool Kit Essentials
A well-equipped toolkit will help you start your sewing trip smoothly. These items are must-haves:
-
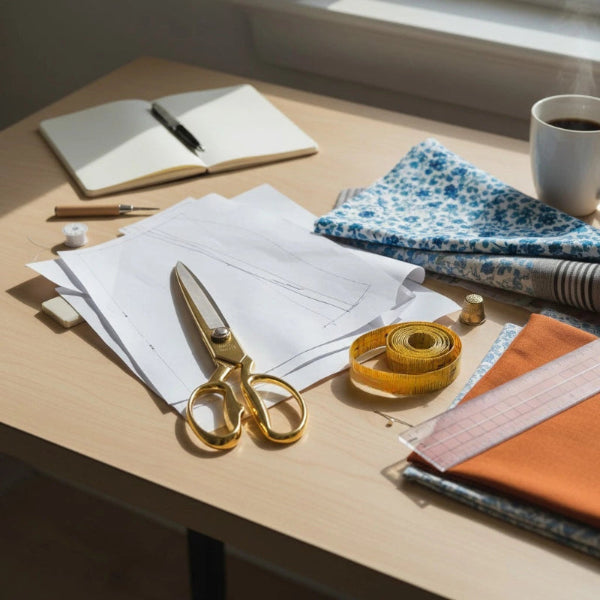
Quality Fabric Scissors: Get bent-handled fabric cutting shears designed specifically for fabric. Keep them away from your regular scissors to stay sharp.
-
Measuring Tools: You'll need a 60-inch flexible tape measure to take accurate measurements. A seam gage comes in handy for precise small measurements.
-
Pins and Cushions: Glass head pins work best since they don't melt under iron heat. A pin cushion or magnetic holder keeps them within easy reach.
-
Thread and Needles: Universal machine needles in size 70/11 work great with medium-weight fabrics. High-quality all-purpose thread in neutral colors will serve you well.
Fabric Selection Guide for Beginners
The right fabric can determine your project's success. Here's what works best:
Best Fabrics for Beginners:
- Cotton broadcloth and quilting cotton
- Medium-weight linen
- Cotton poplin
- Flannel
Lightweight woven fabrics that feel stable, crisp, and tightly woven make the best choices. Your machine handles these materials better, and you'll face fewer challenges.
Fabrics to Avoid:
- Silk satin
- Velvet
- Chiffon
- Sequined materials
Optional Tools That Help
These additional tools can enhance your sewing experience as you progress:
-
Rotary Cutting Set: This has:
- A self-healing cutting mat (24" x 36" works best)
- Rotary cutter
- Clear ruler for straight cuts
-
Marking Tools: Water-soluble marking pencils or chalk markers help you transfer pattern markings safely.
Quality matters more than quantity. Start with the essentials and add tools as needed. A few good tools serve you better than many cheap ones.
Understanding Your Sewing Machine
Your sewing machine awaits after gathering all supplies. Learning about your machine resembles making a new friend - the time investment pays off beautifully.
Parts and Their Functions
A sewing machine might look daunting at first glance, but let's break it down into simple pieces. These components matter most:
- Bobbin and Bobbin Case: They work together to supply the bottom thread during stitch formation
- Presser Foot: This keeps your fabric steady and prevents wrinkles that could ruin your stitches
- Feed Dogs: Small metal teeth pull the fabric through the machine and control material flow
- Tension Regulator: This manages your top thread's tightness - tight threads create puckers, loose ones won't hold
Threading Your Machine Correctly
Threading might seem challenging initially. Most machines share a common pattern. The process works smoothly this way:
- Set your thread spool on the spindle at the top
- Lead the thread through top guides
- Guide it through tension disks
- Thread through the take-up lever
- Thread your needle from front to back
Make sure to hold the thread ends as you begin. This stops them from tangling inside the machine.
Basic Machine Maintenance
Regular maintenance helps your machine last longer. A properly maintained machine serves you well for years. These tips help keep things running smoothly:
Clean after every 2-3 bobbins of sewing. Focus on:
- The bobbin area (brush away lint)
- The feed dogs (remove debris)
- The needle area (look for thread buildup)
A simple cleaning solves many issues. Computerized machines need annual professional maintenance from certified dealers.
Pro Tip: Sewing with fleece or flannel requires immediate machine cleaning. This step prevents performance issues from buildup.
Mastering Basic Hand Stitches
Hand sewing might seem outdated in our machine-dominated world, but it remains a vital skill that every sewist should learn. Let's look at the fundamental hand stitches that will raise your sewing skills.
Running and Basting Stitches
The running stitch serves as your gateway to hand sewing - it's the simplest and most versatile stitch available. You can think of it as the hand-sewn equivalent of your machine's straight stitch. This stitch works great for quick repairs and simple seams.
The basting stitch acts as your temporary helper. It's a longer, looser version of the running stitch. This stitch proves useful to:
- Test garment fit before permanent stitching
- Hold slippery fabrics together
- Replace pins when working with bulky items
- Keep multiple fabric layers in place
Pro tip: A thread color different from your fabric makes removal easier later.
Backstitch and Whipstitch
The backstitch gives strength and durability to your work. It feels like having a mini sewing machine in your hands! Small, strong stitches make it perfect for seams that need extra reinforcement. This stitch works best for:
- Mending seams
- Adding topstitching details
- Securing zippers
The whipstitch helps with hemming and joining finished edges. Diagonal stitches work especially well with wool and felt. This stitch prevents fabric fraying while creating nearly invisible seams.
When to Use Each Stitch Type
Each stitch has its ideal use case. Hand basting gives better control over fabric than machine basting and comes off easily. Running stitches suit simple seams and quick fixes.
The backstitch shines in projects needing durability. It works best for:
- Creating strong seams that resist pulling
- Adding decorative details to garments
- Sewing areas too small for machine stitching
The whipstitch excels at:
- Hemming thick fabrics
- Joining finished edges
- Connecting pieces of knitting or crochet work
Note that hand sewing takes more time than machine stitching but provides better precision and control. These simple stitches open up countless possibilities in your sewing experience.
Learning Machine Stitches
Let's explore the fascinating world of machine stitches beyond simple machine operation. These mechanical marvels will become your trusted companions that help create beautiful, durable projects.
Straight Stitch Techniques
The straight stitch stands out as our most versatile friend in machine sewing. You'll use this stitch in about 90% of your projects. This stitch creates a strong seam and threads interlock at regular intervals.
The best results come from:
- Using a 2.4mm stitch length for general sewing
- Shorter stitches (1.5-2mm) for delicate fabrics
- Longer stitches (3-3.5mm) for heavier materials
Zigzag and Decorative Stitches
The zigzag stitch ranks as the second most important stitch, creating a distinctive W-shaped pattern. The sort of thing I love about this stitch includes:
- Finishing raw edges to prevent fraying
- Sewing stretch fabrics
- Attaching elastic
- Creating decorative effects
Width adjustment plays a vital role with zigzag stitches. A narrow zigzag works perfectly for stretch fabrics, while wider settings excel at edge finishing.
Stitch Length and Width Settings
Stitch adjustments work much like controlling your voice's volume and tone. Experience shows these perfect adjustments:
Stitch Length Basics:
- 2.5mm is standard for most construction
- 4-5mm works best for basting
- 1.5mm creates tight, strong seams
Width Adjustments: Width settings control needle position in straight stitches, offering precise control over seam placement. The needle swings from side to side in zigzag stitches based on width settings.
Pro Tip: Testing stitch settings on fabric scraps shows how the stitching will look and behave on your actual project.
Using a stabilizer underneath your fabric will give a smooth, professional result with decorative stitches. These fancy stitches can revolutionize simple projects, especially when you experiment with different thread weights and colors.
Note that tension makes perfect stitches possible. Lengthening your stitches slightly often fixes puckering issues without adjusting tension dials.
Practice Exercises for Beginners
Practice builds confidence in sewing. Let's take a closer look at exercises that will help you become skilled at machine control and develop muscle memory.
Straight Line Sewing Drills
Paper practice should come before fabric work. Here's a proven way to master straight lines:
- Draw parallel lines on paper at varying distances
- Practice sewing without thread first to get comfortable with machine control
- Add thread and sew along the drawn lines
- Graduate to fabric with marked guidelines
- Practice maintaining consistent seam allowances
Your speed should stay slow and steady. Looking about an inch ahead of the needle, rather than at the needle itself, helps create straighter lines.
Curved and Corner Stitching
Different techniques apply to curves and corners. Here's what works best:
- Gentle Curves: Relaxed hands and smooth fabric guidance create even pressure
- Tight Curves: Stop with the needle down and adjust the fabric's position
- Corner Turns: The needle should be down at the pivot point before lifting the presser foot and rotating fabric
The fabric's edge deserves more attention than the needle when sewing curves - this creates smoother, even results. Princess seams and curved edges need pins placed perpendicular to the seam line for better control.
Seam Practice Projects
These skills need real application now. Simple projects build confidence best. A 1/2 inch seam allowance makes accuracy easier to maintain.
Your first practice sessions should include:
- Straight Seams: Join two fabric rectangles with consistent seam allowances
- Curved Edges: Start with gentle curves before moving to tighter ones
- Corner Projects: Simple square items help perfect precise corners
A contrasting thread color makes stitch consistency easier to assess. Curves need clipped seam allowances without cutting through the stitching line, which helps them lay flat when turned.
The machine's speed control setting helps perfect control. Accuracy comes first, and speed can increase gradually as your confidence grows.
Note that every experienced sewist started right where you are. These fundamental exercises create the foundation for all future projects. Patient practice has helped countless beginners become confident sewists.
Starting Your First Project
That first real sewing project brings an excitement you'll never forget! Now that you've learned the simple techniques and practiced your stitches, it's time to create something real. Here's what you need to know to make your first project shine.
Selecting Beginner-Friendly Patterns
The right pattern choice wins half your battle. Commercial patterns show difficulty ratings, but indie patterns often give more detailed instructions and better support for beginners.
Your first pattern should have these features:
- Simple designs with minimal pattern pieces
- Limited details and straightforward construction
- Clear instructions with visual aids
- Projects that use stable, woven fabrics
- Designs with straight seams rather than curves
Pro Tip: Look at the pattern piece count on the packet's back - fewer pieces usually mean an easier project. Simple tote bags, pillowcases, or basic skirts without zippers make great starter projects.
Reading Pattern Instructions
Pattern instructions might look like a foreign language at first glance. The most significant advice is to read the entire pattern before you begin.
Pattern measurements matter a lot. Note that pattern sizes differ from ready-to-wear clothing sizes. You'll need to measure:
- Bust
- Waist
- Hips
These measurements help you pick the right pattern size. Finding yourself between sizes isn't a problem - we can help you grade between them to get that perfect fit.
Most patterns include:
- Line drawings showing the finished garment
- Fabric suggestions and requirements
- Notions list (zippers, buttons, etc.)
- Cutting layout diagrams
- Step-by-step construction instructions
Project Planning Tips
Experience shows that good planning prevents poor results. Here's our proven project planning approach:
-
Pattern Selection and Sizing
- Get accurate measurements
- Pick the right difficulty level
- Check fabric requirements
-
Fabric Selection
- Match pattern recommendations for fabric type
- Think about fabric properties (drape, weight, stretch)
- Buy extra fabric just in case
-
Preparation Steps
- Pre-wash fabric to avoid future shrinkage
- Iron fabric before cutting
- Get all notions ready
-
Pattern Layout
- Review the cutting layout provided
- Think about pattern matching if needed
- Check grain lines twice
A practice garment (called a muslin) helps test the fit and construction before using your good fabric. Close-fitting garments usually have minimal difference between the size chart measurement and finished piece.
Different fabrics need different marking methods:
- Tailor's chalk
- Carbon paper with tracing wheel
- Washable fabric pens
- Tailor's tacks
Circle the pattern pieces you need based on your chosen version. This simple trick ensures you won't miss any pieces during cutting.
Good fabric preparation makes a difference. Your fabric needs specific properties - should it drape well or stay structured? The pattern envelope points you toward suitable fabric choices.
A project checklist helps you stay organized:
- Pattern selected and sized correctly
- Fabric purchased and pre-treated
- All notions gathered
- Tools ready and in good condition
- Workspace prepared
- Time blocked for uninterrupted sewing
Being organized and taking time to plan properly helps beginners create successful first projects consistently. Patience and attention to detail matter - rushing through these steps often creates problems later.
Conclusion
Sewing can feel overwhelming when you start, but countless beginners become confident creators by doing this. The right tools, a good understanding of your machine, and simple stitches are the foundations of your creative path.
You need practice to succeed in sewing. Simple exercises with straight-line drills and curved stitching will prepare you for complex projects. Note that every expert started exactly where you are now. They succeeded through patience, determination, and learned from their mistakes.
This creative path continues beyond these basics. New skills and confidence emerge from each project. You should focus on one technique at a time. Keep your equipment in good condition. Start with simple projects before tackling challenging ones. A look back at your first stitches will fill you with pride, and you'll be amazed at your progress.


